Block tree (JSON)
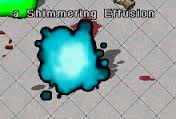
{"type":"doc","content":[{"type":"image","attrs":{"file":"SEffusion.jpg","width":null,"align":null,"caption":"The Shimmering Effusion"}},{"type":"paragraph","attrs":{"align":null},"content":[{"type":"text","text":"The Shimmering Effusion is the "},{"type":"reference","attrs":{"target_type":"article","target_id":1328,"label":null}},{"type":"text","text":" boss for the "},{"type":"reference","attrs":{"target_type":"article","target_id":1416,"label":null}},{"type":"text","text":" "},{"type":"reference","attrs":{"target_type":"article","target_id":549,"label":null}},{"type":"text","text":", which is located on the north end of the island on which the city of "},{"type":"reference","attrs":{"target_type":"article","target_id":1254,"label":null}},{"type":"text","text":" is located."}]},{"type":"paragraph","attrs":{"align":null},"content":[{"type":"text","text":"The Effusion can be killed solo. When acquiring the keys area "},{"type":"reference","attrs":{"target_type":"skill","target_id":44,"label":null}},{"type":"text","text":" is an asset."}]},{"type":"heading","attrs":{"level":2},"content":[{"type":"text","text":"Abilities"}]},{"type":"bulletList","content":[{"type":"listItem","content":[{"type":"paragraph","attrs":{"align":null},"content":[{"type":"text","text":"Spawns various creatures during the fight. Has a very high "},{"type":"reference","attrs":{"target_type":"skill","target_id":35,"label":null}},{"type":"text","text":" skill level. Drops "},{"type":"reference","attrs":{"target_type":"resource","target_id":48,"label":null}},{"type":"text","text":", "},{"type":"reference","attrs":{"target_type":"article","target_id":449,"label":null}},{"type":"text","text":", various ingredients, [[Shimmering Crystals]], and more."}]}]}]},{"type":"heading","attrs":{"level":2},"content":[{"type":"text","text":"Tactics"}]},{"type":"bulletList","content":[{"type":"listItem","content":[{"type":"paragraph","attrs":{"align":null},"content":[{"type":"text","text":"Always kill the summoned creatures first. Especially the "},{"type":"reference","attrs":{"target_type":"monster","target_id":116,"label":null}},{"type":"text","text":"s take a while to kill and have high physical resists. If you fail to kill the summoned creatures quickly the spawn can get out of hand. Barding skills help a lot. If too many creatures have spawned leave the main room through the red moon gate. Lure the spawn away from the teleporter tile and go back killing the spawn one by one. Beyond the red moon gate there is also an ankh. Be careful with the second moon gate: It leads out of the peerless area and there is no way back."}]}]}]},{"type":"heading","attrs":{"level":2},"content":[{"type":"text","text":"Keys"}]},{"type":"bulletList","content":[{"type":"listItem","content":[{"type":"paragraph","attrs":{"align":null},"content":[{"type":"text","text":"Kill "},{"type":"reference","attrs":{"target_type":"monster","target_id":131,"label":null}},{"type":"text","text":"s, "},{"type":"reference","attrs":{"target_type":"monster","target_id":135,"label":null}},{"type":"text","text":"s, "},{"type":"reference","attrs":{"target_type":"monster","target_id":133,"label":null}},{"type":"text","text":"s, "},{"type":"reference","attrs":{"target_type":"monster","target_id":136,"label":null}},{"type":"text","text":"es, "},{"type":"reference","attrs":{"target_type":"monster","target_id":134,"label":null}},{"type":"text","text":"s, and "},{"type":"reference","attrs":{"target_type":"monster","target_id":684,"label":null}},{"type":"text","text":"-ies to get 6 Crystal Keys."}]}]}]},{"type":"paragraph","attrs":{"align":null},"content":[{"type":"reference","attrs":{"target_type":"monster","target_id":131,"label":null}},{"type":"text","text":": "},{"type":"reference","attrs":{"target_type":"item","target_id":1272,"label":null}}]},{"type":"paragraph","attrs":{"align":null},"content":[{"type":"reference","attrs":{"target_type":"monster","target_id":133,"label":null}},{"type":"text","text":": Shattered Crystals"}]},{"type":"paragraph","attrs":{"align":null},"content":[{"type":"reference","attrs":{"target_type":"monster","target_id":135,"label":null}},{"type":"text","text":": "},{"type":"reference","attrs":{"target_type":"item","target_id":348,"label":null}}]},{"type":"paragraph","attrs":{"align":null},"content":[{"type":"reference","attrs":{"target_type":"monster","target_id":136,"label":null}},{"type":"text","text":": Jagged Crystals"}]},{"type":"paragraph","attrs":{"align":null},"content":[{"type":"reference","attrs":{"target_type":"monster","target_id":134,"label":null}},{"type":"text","text":": "},{"type":"reference","attrs":{"target_type":"item","target_id":1124,"label":null}}]},{"type":"paragraph","attrs":{"align":null},"content":[{"type":"reference","attrs":{"target_type":"monster","target_id":684,"label":null}},{"type":"text","text":": "},{"type":"reference","attrs":{"target_type":"item","target_id":240,"label":null}}]},{"type":"bulletList","content":[{"type":"listItem","content":[{"type":"paragraph","attrs":{"align":null},"content":[{"type":"text","text":"The point at which you exchange the Crystals for the main keys is VERY deep in the dungeon. Demons and mummies have a high key drop rate. Hydras, Vortices and Lattice seekers have their keys less often. Usually the critical key is that of the "},{"type":"reference","attrs":{"target_type":"monster","target_id":135,"label":null}},{"type":"text","text":"s. They are easy to kill but do not have a high key drop rate."}]}]},{"type":"listItem","content":[{"type":"paragraph","attrs":{"align":null},"content":[{"type":"text","text":"Some find that a Mystic Mage is the easiest way to farm keys, some doing so in about 20 minutes! (example template: 120 mysticism, 120 imbuing, 120 magery, 120 evalint, 120 mediation, 120 Spellweaving) Keep yourself invised and let the "},{"type":"reference","attrs":{"target_type":"spell","target_id":111,"label":null}},{"type":"text","text":" do all the work. Another good template is a mage bard."}]}]},{"type":"listItem","content":[{"type":"paragraph","attrs":{"align":null},"content":[{"type":"text","text":"Do not be confused by the crystals that do not have timers. The untimed crystals are part of a quest and are the base ingredient for "},{"type":"reference","attrs":{"target_type":"item","target_id":350,"label":"crystal dust"}},{"type":"text","text":". They are not "},{"type":"reference","attrs":{"target_type":"article","target_id":1328,"label":null}},{"type":"text","text":" keys."}]}]}]},{"type":"heading","attrs":{"level":2},"content":[{"type":"text","text":"Dropping Keys"}]},{"type":"paragraph","attrs":{"align":null},"content":[{"type":"text","text":"In the "},{"type":"reference","attrs":{"target_type":"monster","target_id":684,"label":"unfrozen mummy"}},{"type":"text","text":" room, there are six pillars. Each key must be dropped on the correct pillar, in the proper order. Stand near the middle of the top three pillars and invis. Drop the first three keys in order, and then do the same for the bottom three."}]},{"type":"paragraph","attrs":{"align":null},"content":[{"type":"text","text":"This is the order to drop:"}]},{"type":"paragraph","attrs":{"align":null},"content":[{"type":"text","text":"Broken, Crushed, Pieces"}]},{"type":"paragraph","attrs":{"align":null},"content":[{"type":"text","text":"Scattered, Jagged, Shattered"}]},{"type":"paragraph","attrs":{"align":null},"content":[{"type":"text","text":"You will then be given the keys to enter and fight Shimmering Effusion."}]},{"type":"heading","attrs":{"level":2},"content":[{"type":"text","text":"Loot"}]},{"type":"table","content":[{"type":"tableRow","content":[{"type":"tableCell","attrs":{"colspan":1,"rowspan":1,"colwidth":null},"content":[{"type":"paragraph","attrs":{"align":null},"content":[{"type":"text","text":"Shimmering Crystals"}]},{"type":"image","attrs":{"file":"Shimmering_crystals_1.jpg","width":null,"align":null,"caption":null}},{"type":"image","attrs":{"file":"Shimmering_crystals_2.gif","width":null,"align":null,"caption":null}}]},{"type":"tableCell","attrs":{"colspan":1,"rowspan":1,"colwidth":null},"content":[{"type":"paragraph","attrs":{"align":null},"content":[{"type":"text","text":"Comes in several types and several greenish colors. Ingredient for "},{"type":"reference","attrs":{"target_type":"article","target_id":440,"label":null}},{"type":"text","text":"."}]}]},{"type":"tableCell","attrs":{"colspan":1,"rowspan":1,"colwidth":null},"content":[{"type":"paragraph","attrs":{"align":null},"content":[{"type":"text","text":"Common"}]}]}]},{"type":"tableRow","content":[{"type":"tableCell","attrs":{"colspan":1,"rowspan":1,"colwidth":null},"content":[{"type":"paragraph","attrs":{"align":null},"content":[{"type":"reference","attrs":{"target_type":"article","target_id":405,"label":null}}]},{"type":"image","attrs":{"file":"Corporeal_brume_statuette.jpg","width":null,"align":null,"caption":null}}]},{"type":"tableCell","attrs":{"colspan":1,"rowspan":1,"colwidth":null},"content":[{"type":"paragraph","attrs":{"align":null},"content":[{"type":"text","text":"Decorative. Makes sounds"}]}]},{"type":"tableCell","attrs":{"colspan":1,"rowspan":1,"colwidth":null},"content":[{"type":"paragraph","attrs":{"align":null},"content":[{"type":"text","text":"Uncommon"}]}]}]},{"type":"tableRow","content":[{"type":"tableCell","attrs":{"colspan":1,"rowspan":1,"colwidth":null},"content":[{"type":"paragraph","attrs":{"align":null},"content":[{"type":"reference","attrs":{"target_type":"article","target_id":1134,"label":null}}]},{"type":"image","attrs":{"file":"Mantra_effervescence_statuette.gif","width":null,"align":null,"caption":null}}]},{"type":"tableCell","attrs":{"colspan":1,"rowspan":1,"colwidth":null},"content":[{"type":"paragraph","attrs":{"align":null},"content":[{"type":"text","text":"Decorative. Makes sounds"}]}]},{"type":"tableCell","attrs":{"colspan":1,"rowspan":1,"colwidth":null},"content":[{"type":"paragraph","attrs":{"align":null},"content":[{"type":"text","text":"Uncommon"}]}]}]},{"type":"tableRow","content":[{"type":"tableCell","attrs":{"colspan":1,"rowspan":1,"colwidth":null},"content":[{"type":"paragraph","attrs":{"align":null},"content":[{"type":"reference","attrs":{"target_type":"article","target_id":664,"label":null}}]},{"type":"image","attrs":{"file":"Corporeal_brume_statuette.jpg","width":null,"align":null,"caption":null}}]},{"type":"tableCell","attrs":{"colspan":1,"rowspan":1,"colwidth":null},"content":[{"type":"paragraph","attrs":{"align":null},"content":[{"type":"text","text":"Decorative. Makes sounds"}]}]},{"type":"tableCell","attrs":{"colspan":1,"rowspan":1,"colwidth":null},"content":[{"type":"paragraph","attrs":{"align":null},"content":[{"type":"text","text":"Uncommon"}]}]}]},{"type":"tableRow","content":[{"type":"tableCell","attrs":{"colspan":1,"rowspan":1,"colwidth":null},"content":[{"type":"paragraph","attrs":{"align":null},"content":[{"type":"reference","attrs":{"target_type":"article","target_id":1599,"label":null}}]},{"type":"image","attrs":{"file":"Mantra_effervescence_statuette.gif","width":null,"align":null,"caption":null}}]},{"type":"tableCell","attrs":{"colspan":1,"rowspan":1,"colwidth":null},"content":[{"type":"paragraph","attrs":{"align":null},"content":[{"type":"text","text":"Decorative. Makes sounds"}]}]},{"type":"tableCell","attrs":{"colspan":1,"rowspan":1,"colwidth":null},"content":[{"type":"paragraph","attrs":{"align":null},"content":[{"type":"text","text":"Uncommon"}]}]}]},{"type":"tableRow","content":[{"type":"tableCell","attrs":{"colspan":1,"rowspan":1,"colwidth":null},"content":[{"type":"paragraph","attrs":{"align":null},"content":[{"type":"reference","attrs":{"target_type":"article","target_id":34,"label":null}}]},{"type":"image","attrs":{"file":"FCrystal.png","width":null,"align":null,"caption":null}}]},{"type":"tableCell","attrs":{"colspan":1,"rowspan":1,"colwidth":null},"content":[{"type":"paragraph","attrs":{"align":null},"content":[{"type":"text","text":"Summons a max skilled pet ferret"}]}]},{"type":"tableCell","attrs":{"colspan":1,"rowspan":1,"colwidth":null},"content":[{"type":"paragraph","attrs":{"align":null},"content":[{"type":"text","text":"Uncommon"}]}]}]},{"type":"tableRow","content":[{"type":"tableCell","attrs":{"colspan":1,"rowspan":1,"colwidth":null},"content":[{"type":"paragraph","attrs":{"align":null},"content":[{"type":"reference","attrs":{"target_type":"article","target_id":449,"label":null}}]},{"type":"image","attrs":{"file":"Crystalline_Ring.PNG","width":null,"align":null,"caption":null}}]},{"type":"tableCell","attrs":{"colspan":1,"rowspan":1,"colwidth":null},"content":[{"type":"paragraph","attrs":{"align":null},"content":[{"type":"text","text":"Magery +20 Focus +20 Hit Point Regen 5 Mana Regen 3 Spell Damage Increase 20%"}]}]},{"type":"tableCell","attrs":{"colspan":1,"rowspan":1,"colwidth":null},"content":[{"type":"paragraph","attrs":{"align":null},"content":[{"type":"text","text":"Rare"}]}]}]},{"type":"tableRow","content":[{"type":"tableCell","attrs":{"colspan":1,"rowspan":1,"colwidth":null},"content":[{"type":"paragraph","attrs":{"align":null},"content":[{"type":"reference","attrs":{"target_type":"resource","target_id":48,"label":null}}]},{"type":"image","attrs":{"file":"Captured_Essence.png","width":null,"align":null,"caption":null}}]},{"type":"tableCell","attrs":{"colspan":1,"rowspan":1,"colwidth":null},"content":[{"type":"paragraph","attrs":{"align":null},"content":[{"type":"text","text":"Ingredient for Craftable Artifacts"}]}]},{"type":"tableCell","attrs":{"colspan":1,"rowspan":1,"colwidth":null},"content":[{"type":"paragraph","attrs":{"align":null},"content":[{"type":"text","text":"Common"}]}]}]}]},{"type":"paragraph","attrs":{"align":null},"content":[{"type":"text","text":"Each ML peerless will drop 8 mixed items (total) from the following group:"}]},{"type":"table","content":[{"type":"tableRow","content":[{"type":"tableCell","attrs":{"colspan":1,"rowspan":1,"colwidth":null},"content":[{"type":"paragraph","attrs":{"align":null},"content":[{"type":"reference","attrs":{"target_type":"resource","target_id":61,"label":null}}]},{"type":"image","attrs":{"file":"Corruption.png","width":null,"align":null,"caption":null}}]},{"type":"tableCell","attrs":{"colspan":1,"rowspan":1,"colwidth":null},"content":[{"type":"paragraph","attrs":{"align":null},"content":[{"type":"reference","attrs":{"target_type":"resource","target_id":235,"label":null}}]},{"type":"image","attrs":{"file":"Taint.png","width":null,"align":null,"caption":null}}]},{"type":"tableCell","attrs":{"colspan":1,"rowspan":1,"colwidth":null},"content":[{"type":"paragraph","attrs":{"align":null},"content":[{"type":"reference","attrs":{"target_type":"resource","target_id":27,"label":null}}]},{"type":"image","attrs":{"file":"Blight.png","width":null,"align":null,"caption":null}}]}]},{"type":"tableRow","content":[{"type":"tableCell","attrs":{"colspan":1,"rowspan":1,"colwidth":null},"content":[{"type":"paragraph","attrs":{"align":null},"content":[{"type":"reference","attrs":{"target_type":"resource","target_id":188,"label":null}}]},{"type":"image","attrs":{"file":"Putrefaction.png","width":null,"align":null,"caption":null}}]},{"type":"tableCell","attrs":{"colspan":1,"rowspan":1,"colwidth":null},"content":[{"type":"paragraph","attrs":{"align":null},"content":[{"type":"reference","attrs":{"target_type":"resource","target_id":159,"label":null}}]},{"type":"image","attrs":{"file":"Muculent.png","width":null,"align":null,"caption":null}}]},{"type":"tableCell","attrs":{"colspan":1,"rowspan":1,"colwidth":null},"content":[{"type":"paragraph","attrs":{"align":null},"content":[{"type":"reference","attrs":{"target_type":"resource","target_id":212,"label":null}}]},{"type":"image","attrs":{"file":"Scourge.png","width":null,"align":null,"caption":null}}]}]}]},{"type":"heading","attrs":{"level":2},"content":[{"type":"text","text":"See Also"}]},{"type":"bulletList","content":[{"type":"listItem","content":[{"type":"paragraph","attrs":{"align":null},"content":[{"type":"reference","attrs":{"target_type":"article","target_id":1328,"label":null}}]}]},{"type":"listItem","content":[{"type":"paragraph","attrs":{"align":null},"content":[{"type":"reference","attrs":{"target_type":"monster","target_id":96,"label":null}},{"type":"text","text":" - "},{"type":"reference","attrs":{"target_type":"monster","target_id":179,"label":null}},{"type":"text","text":" - "},{"type":"reference","attrs":{"target_type":"monster","target_id":369,"label":null}},{"type":"text","text":" - "},{"type":"reference","attrs":{"target_type":"monster","target_id":428,"label":null}},{"type":"text","text":" - "},{"type":"reference","attrs":{"target_type":"monster","target_id":669,"label":null}}]}]}]}]}